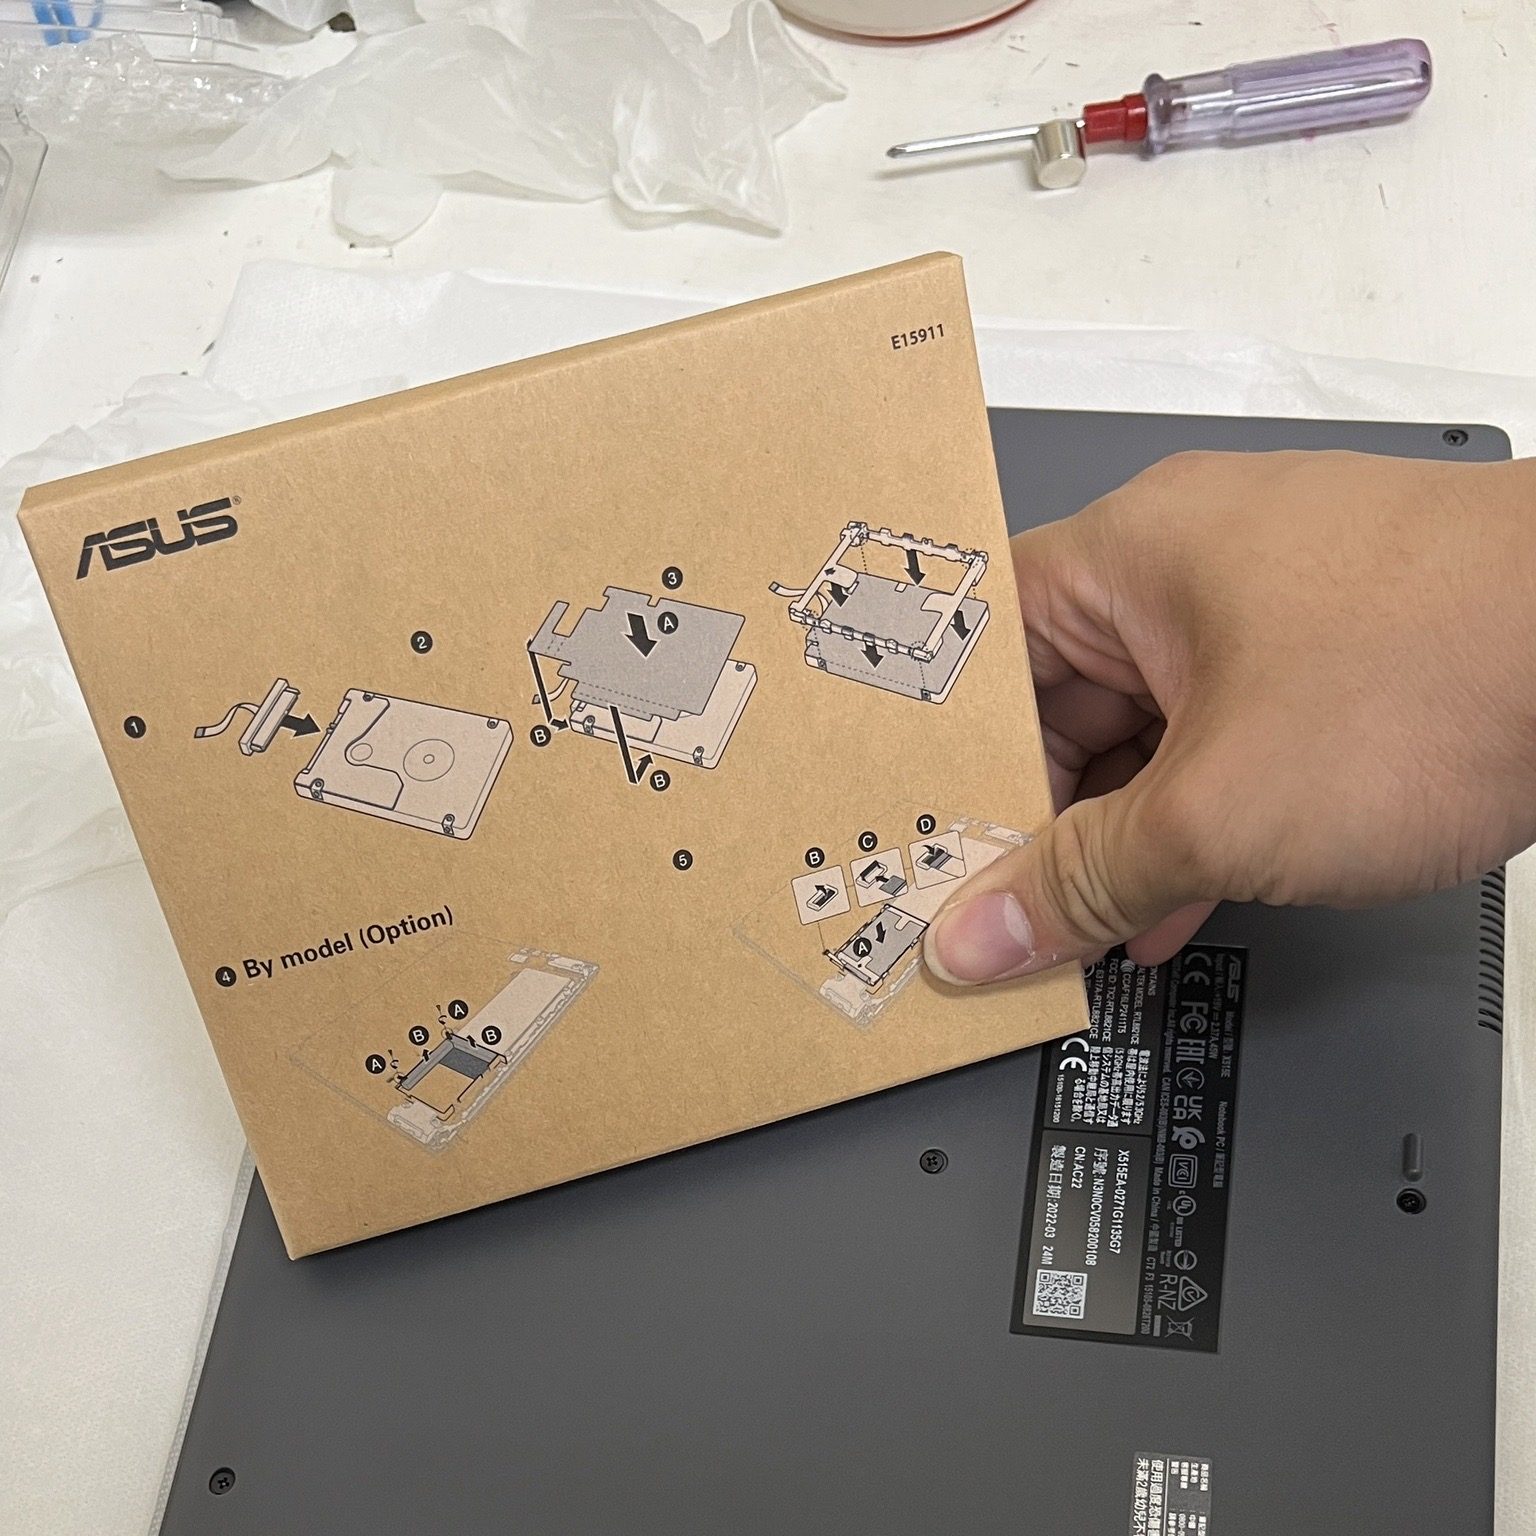
1.首先拿出在筆電盒裝內的筆電硬碟擴充包

2.打開擴充包後,會得到三個零件
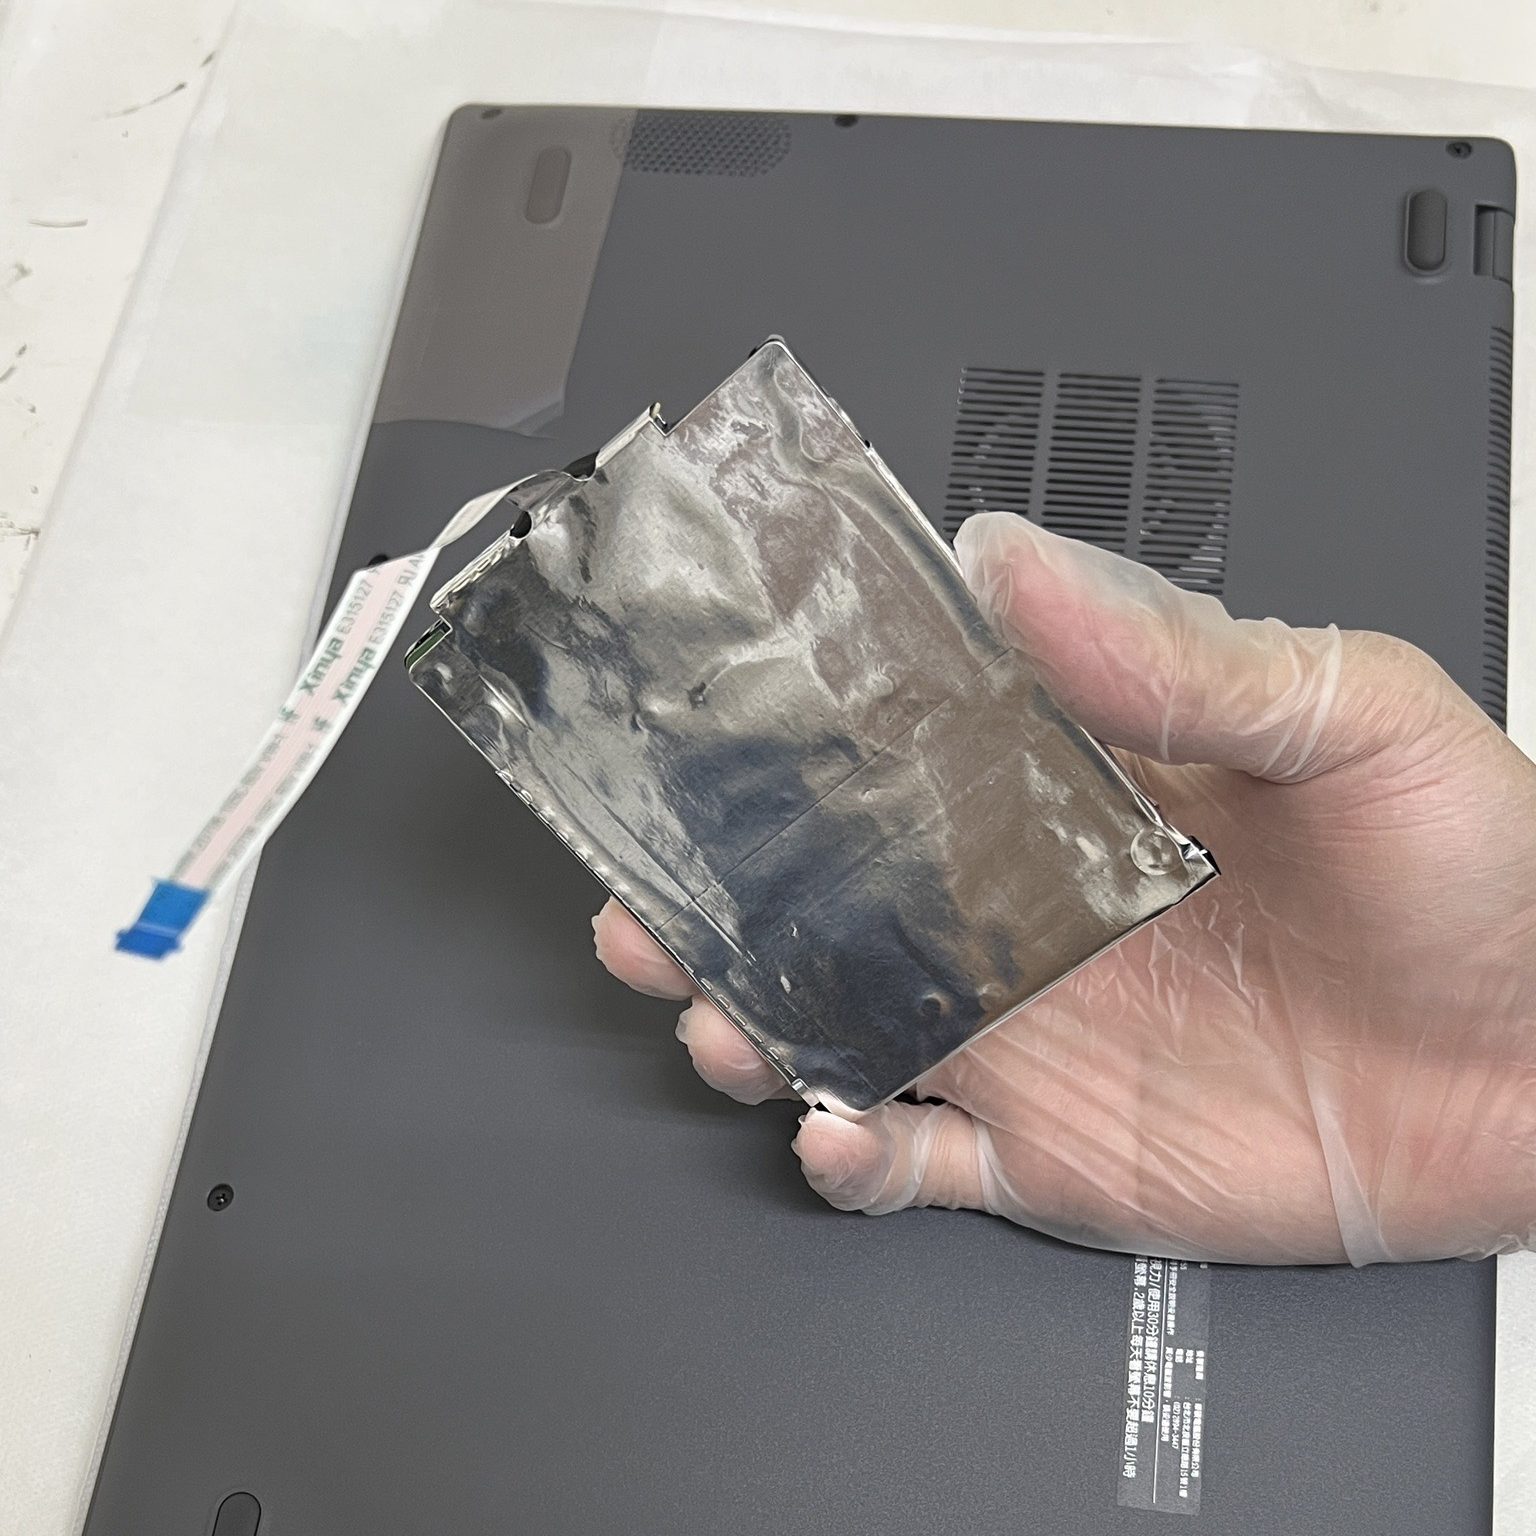
防護貼:用於防止金屬接點短路
防震橡皮套:用於嵌入筆電
排線:用於連接筆電
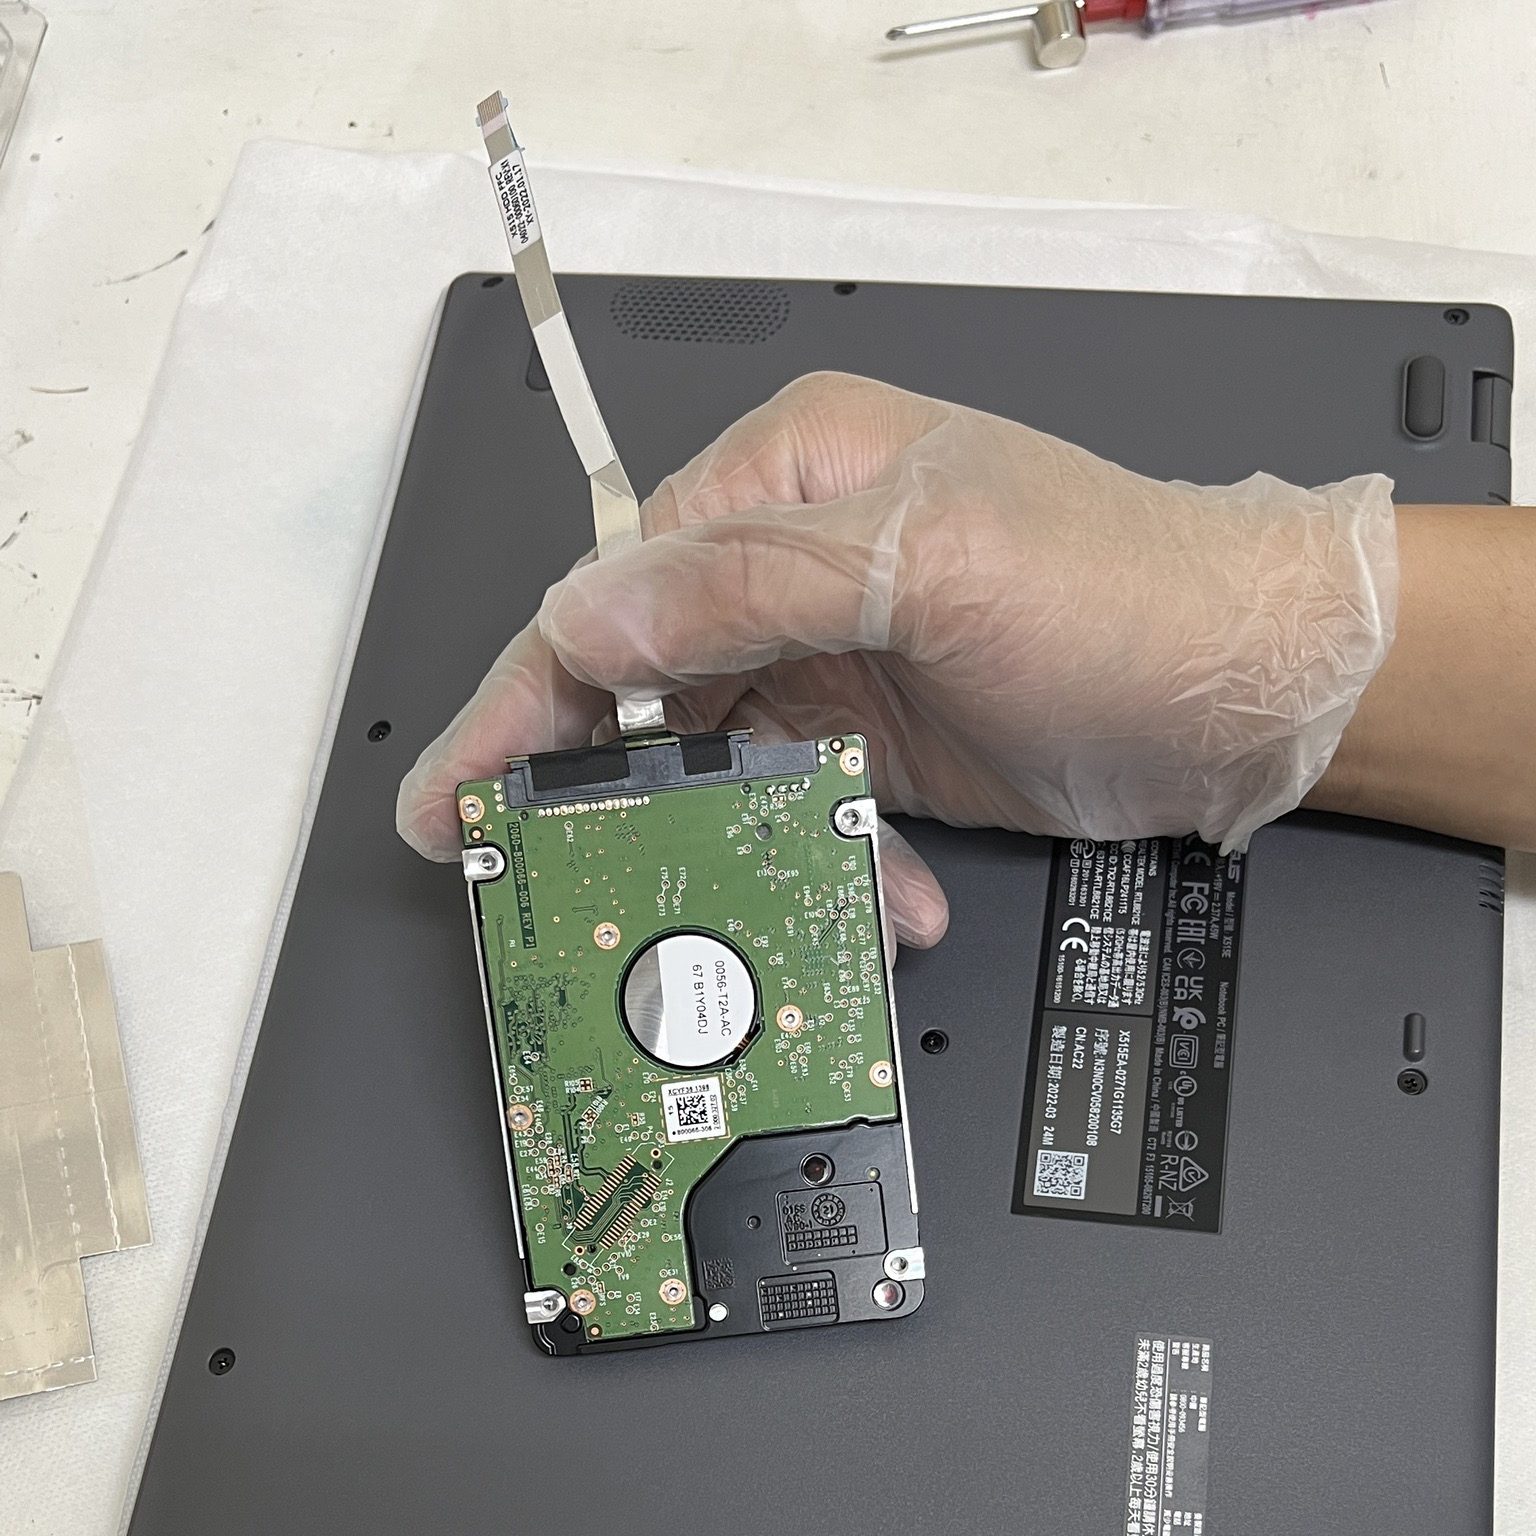
3.將排線插入欲內接的硬碟
5.將保護貼貼紙貼好
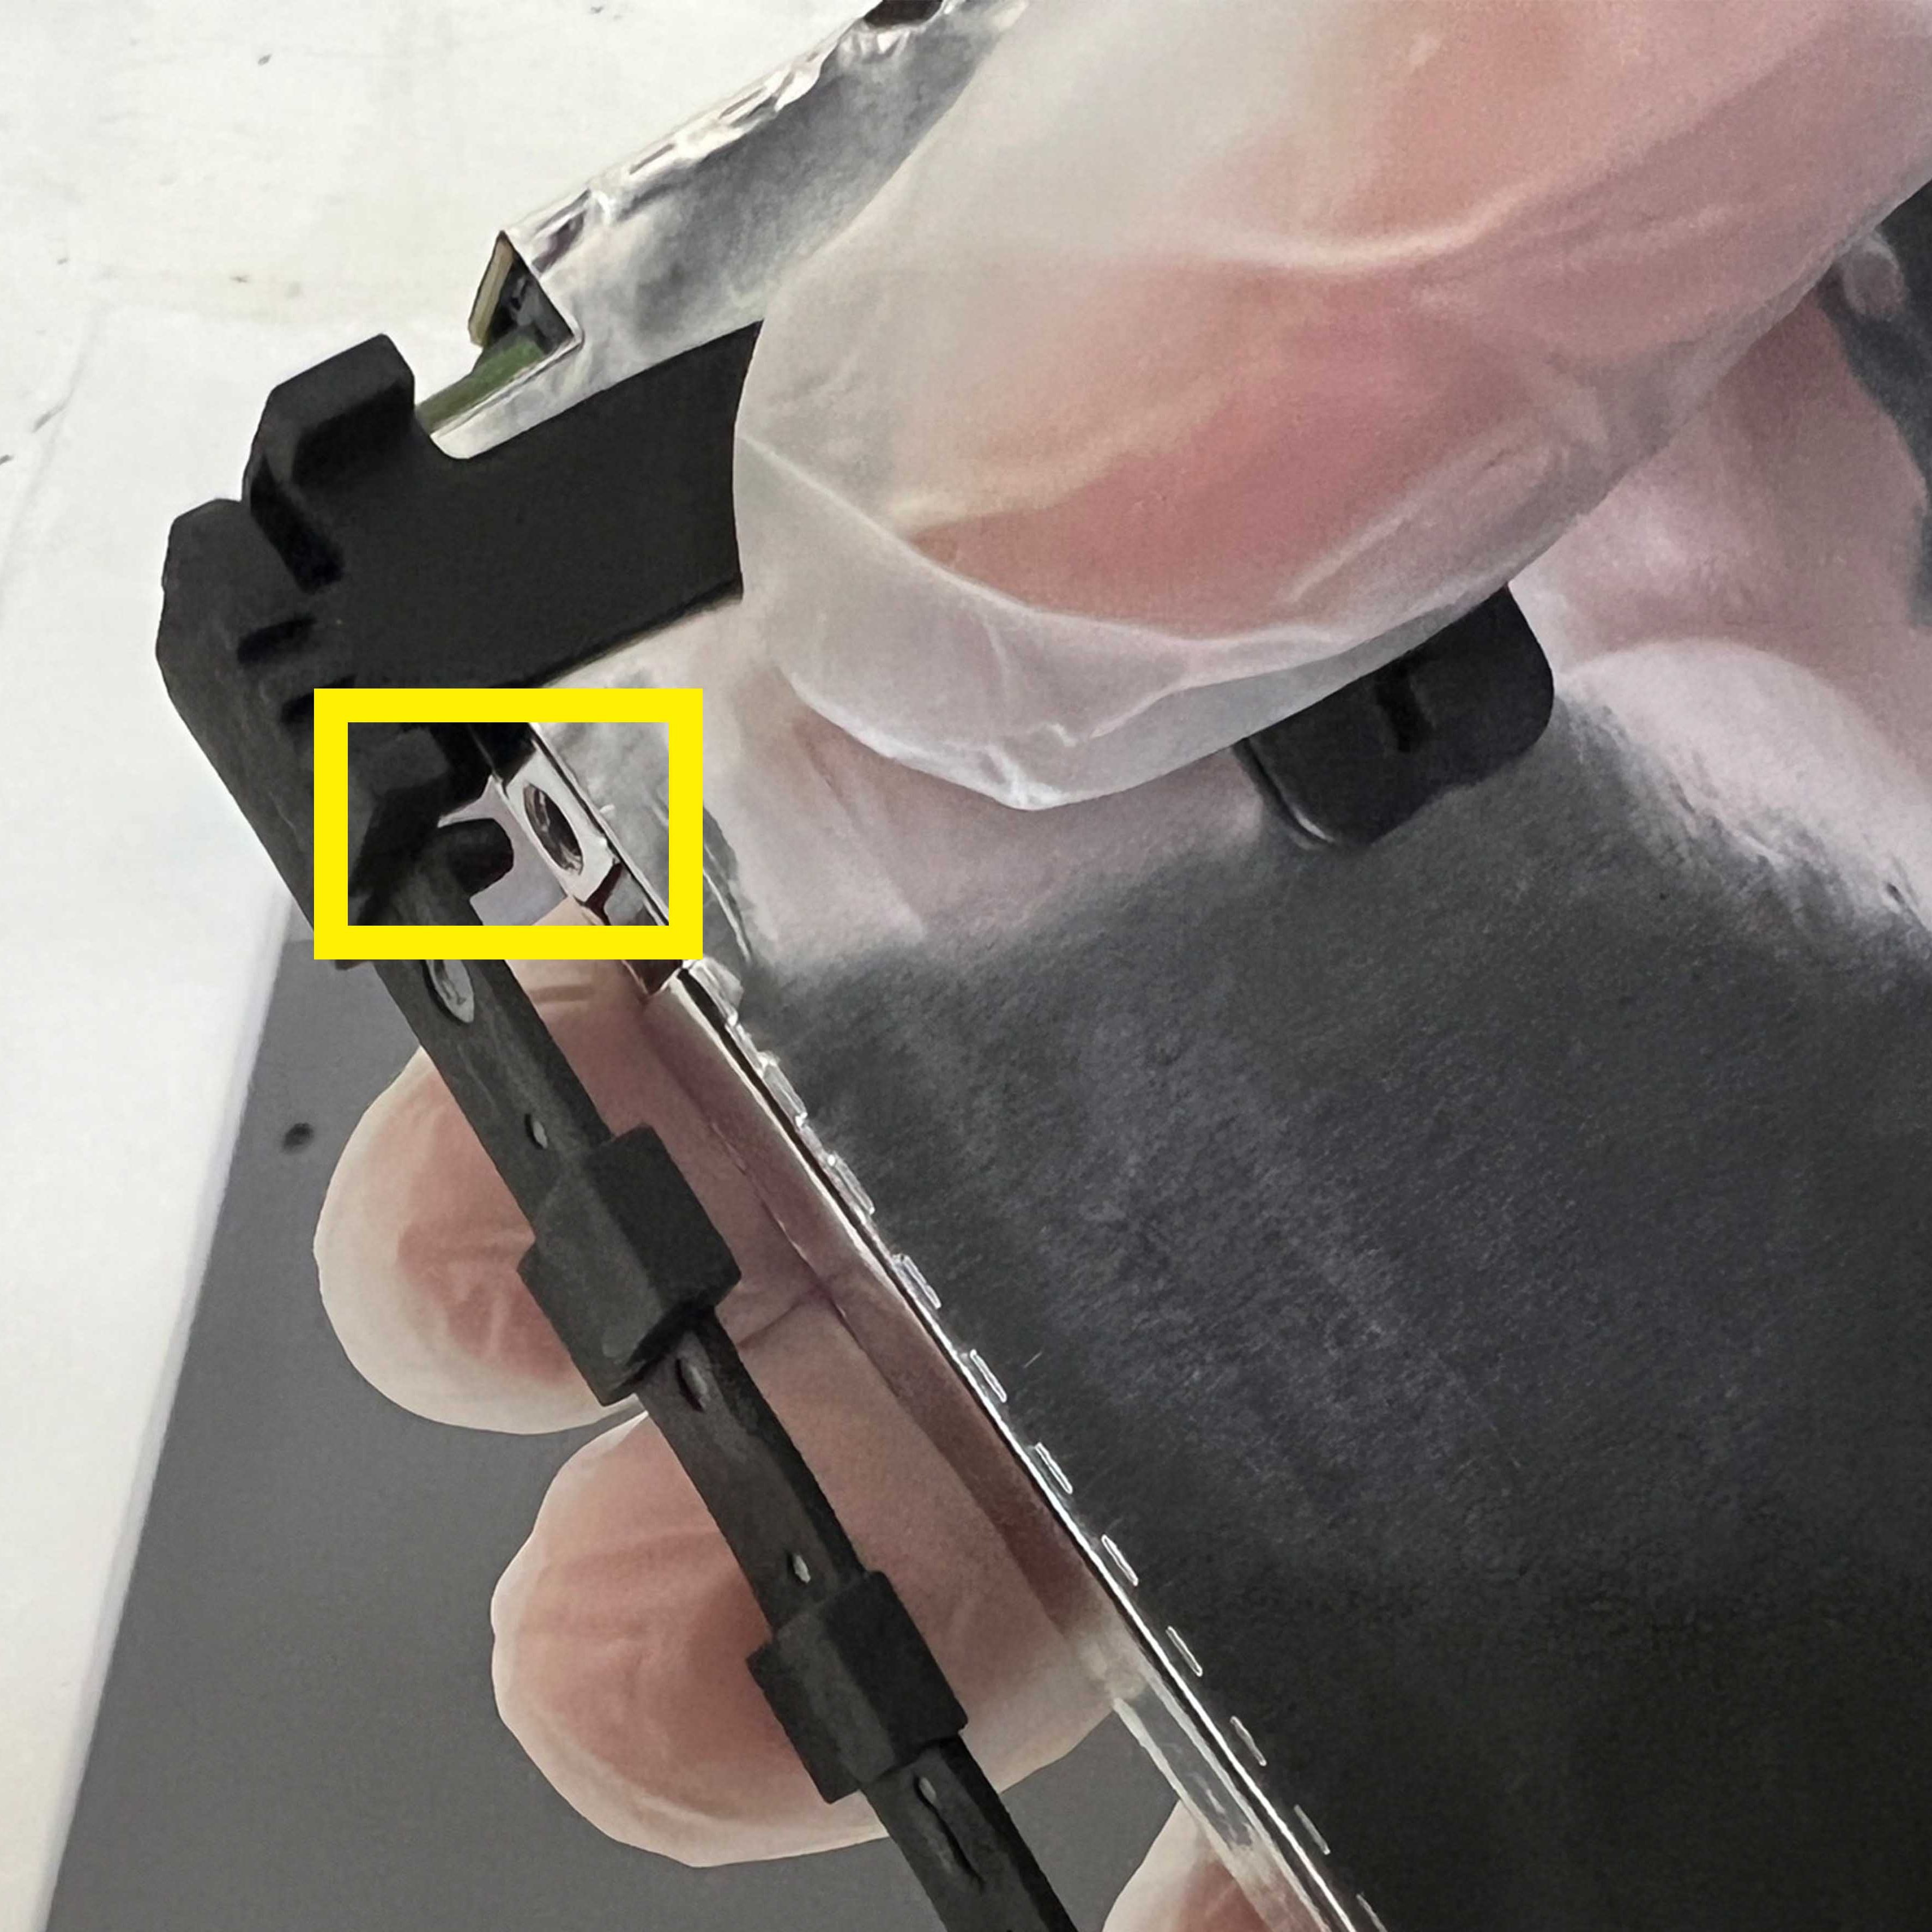
6.注意!將黑色卡准對到硬碟卡准上
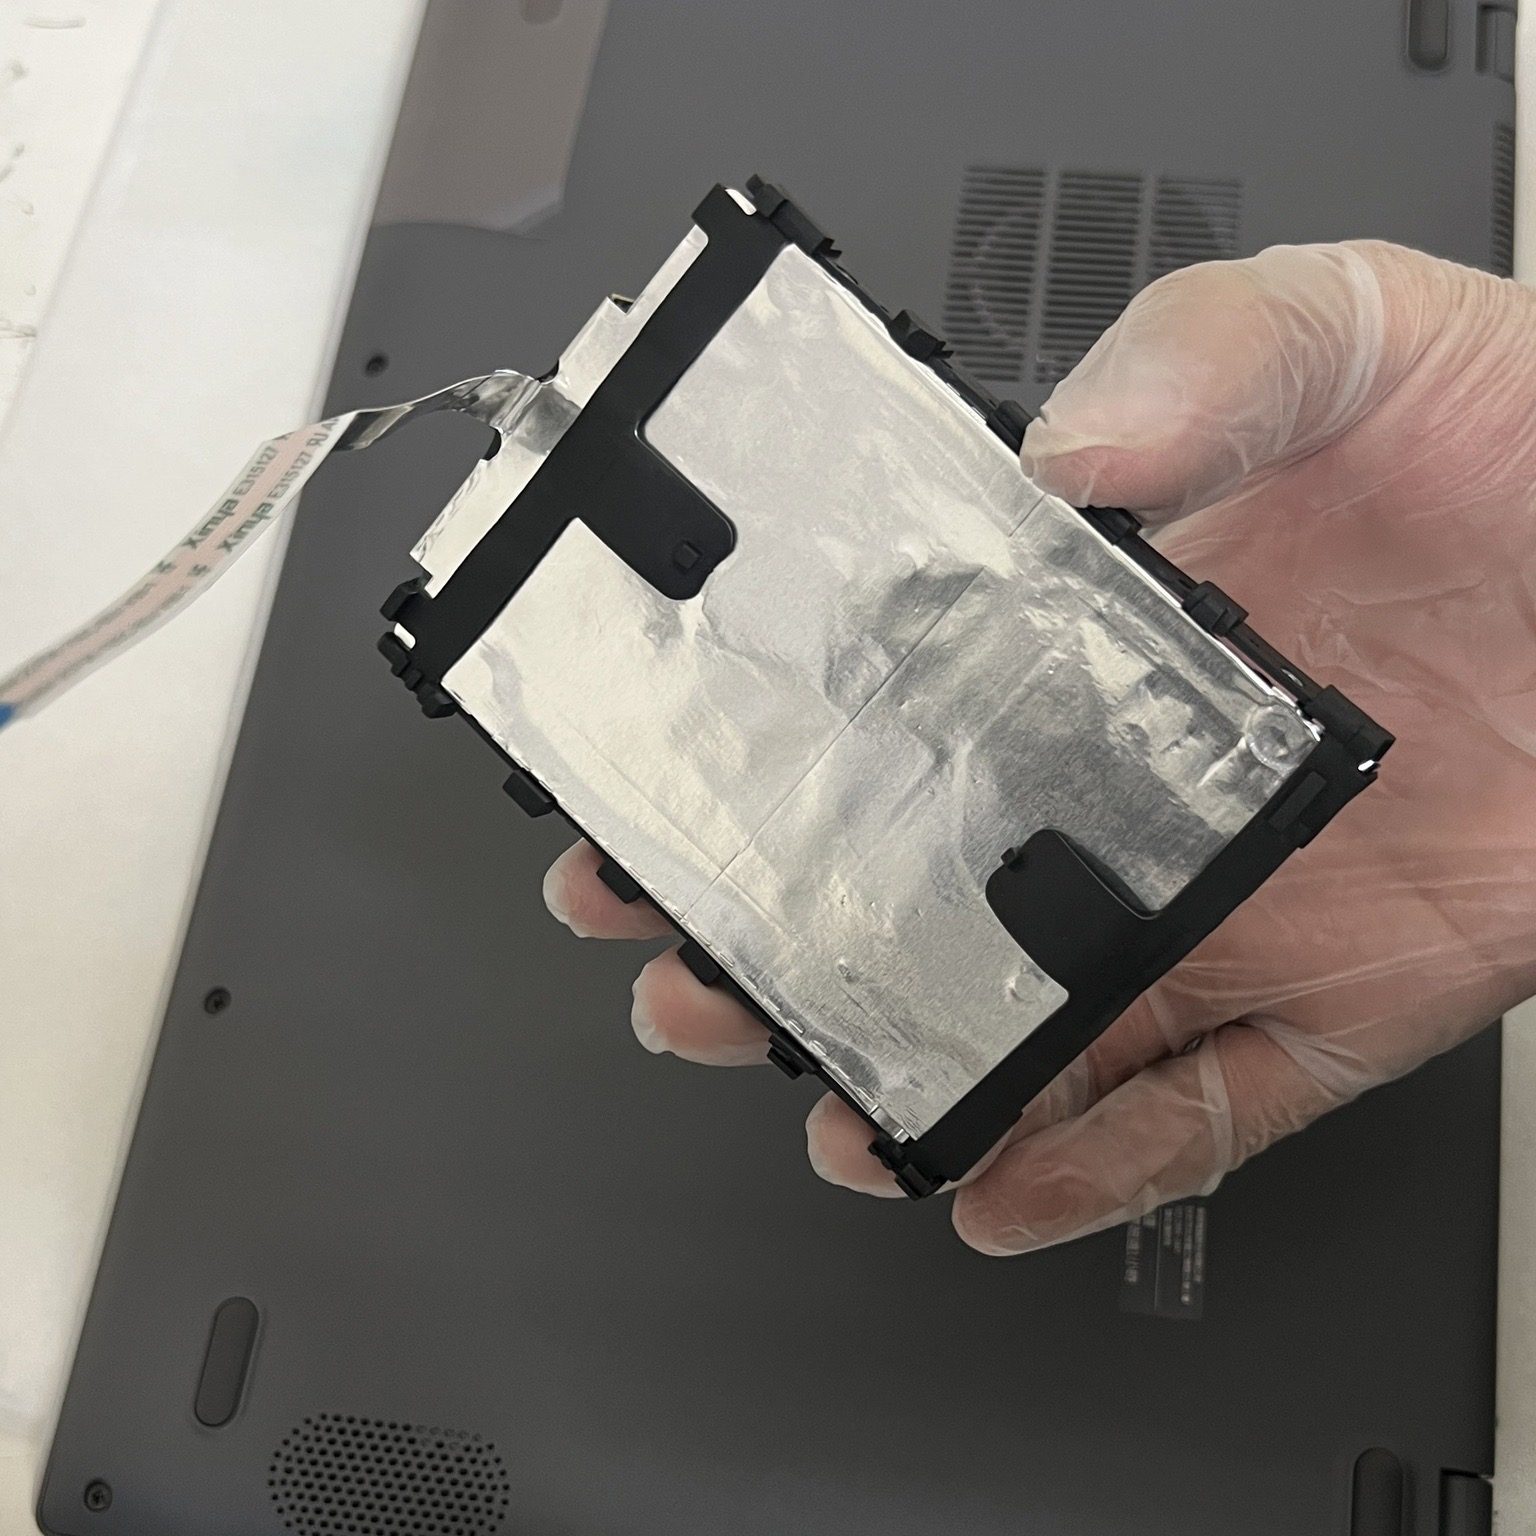
7.將四個邊都套上橡皮套,將硬碟放到旁邊備用
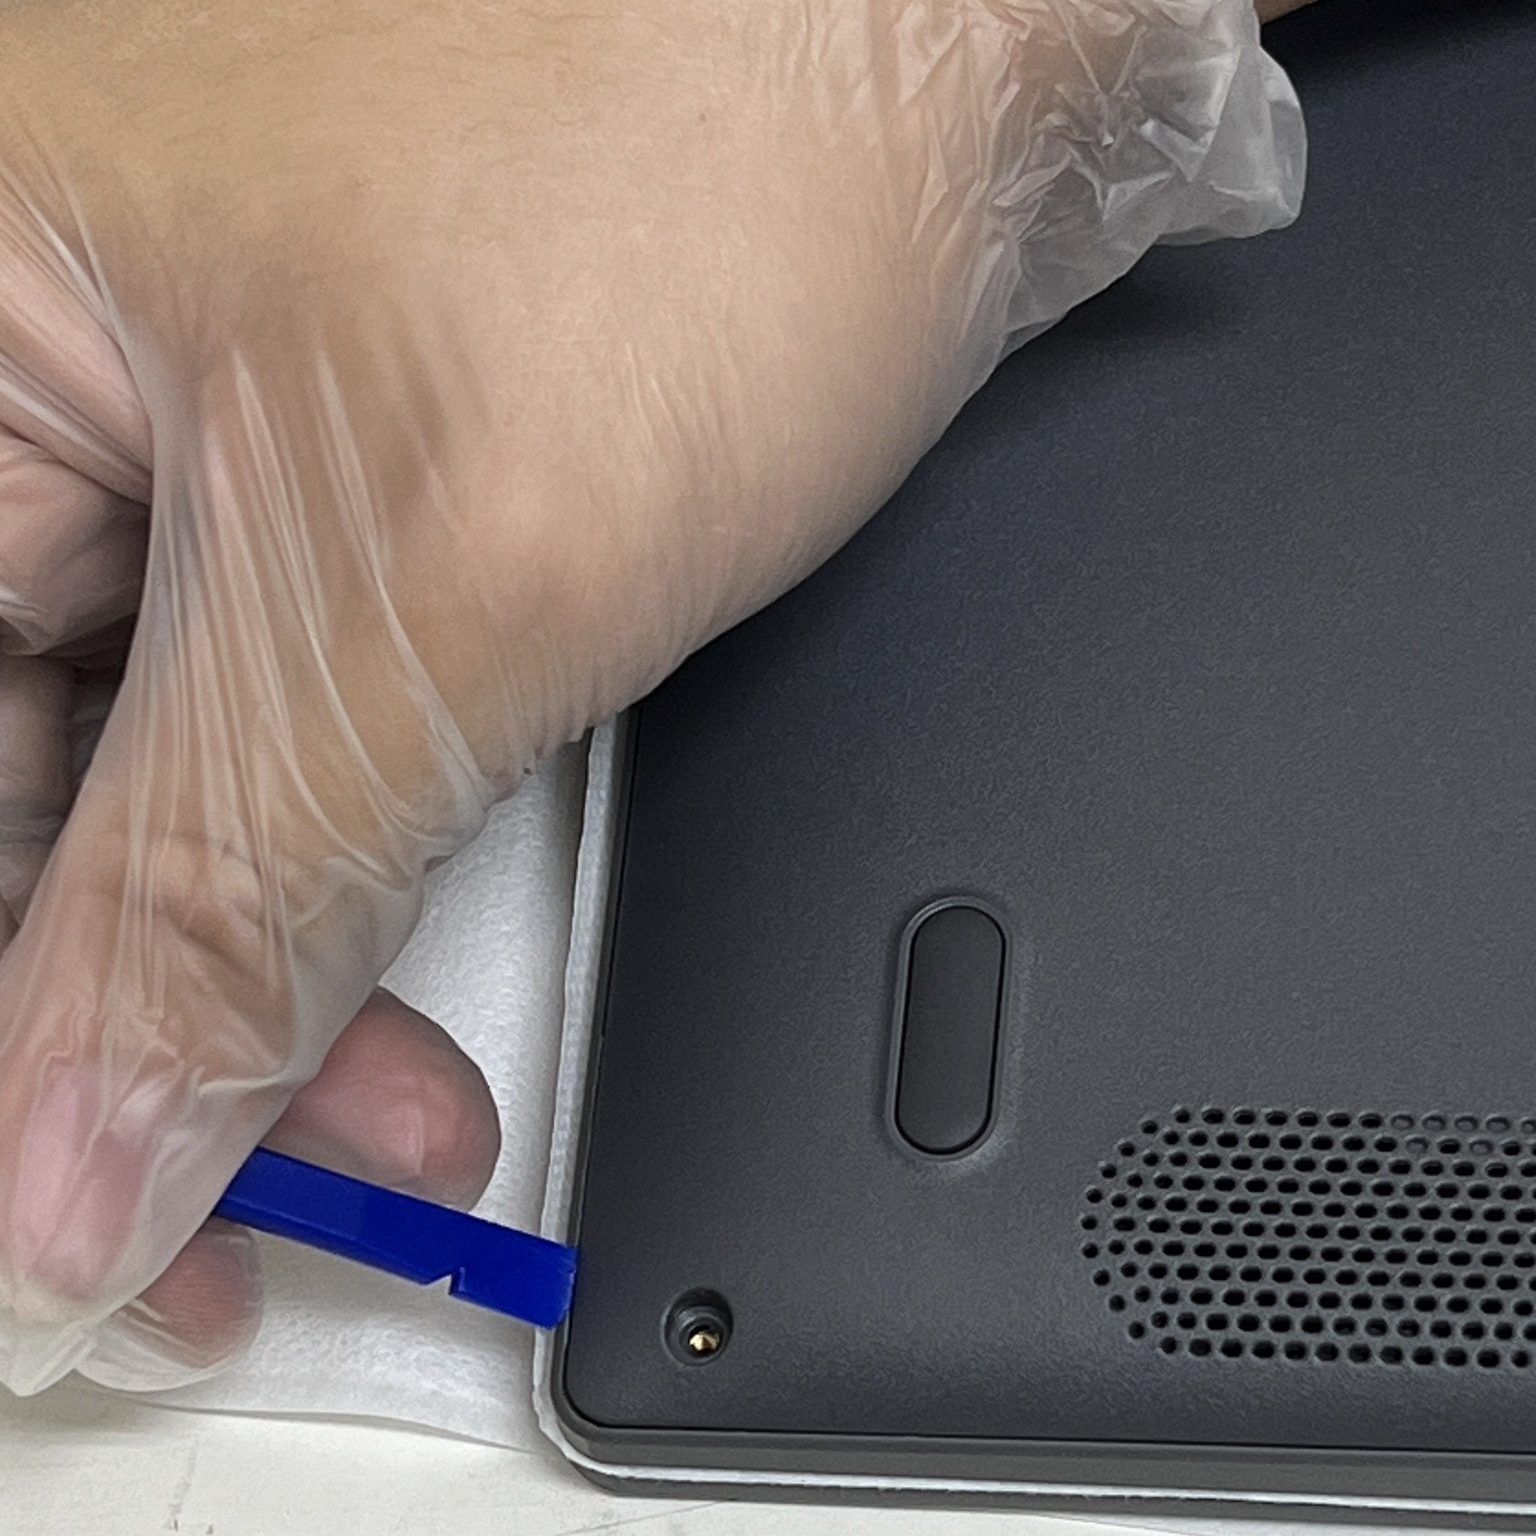
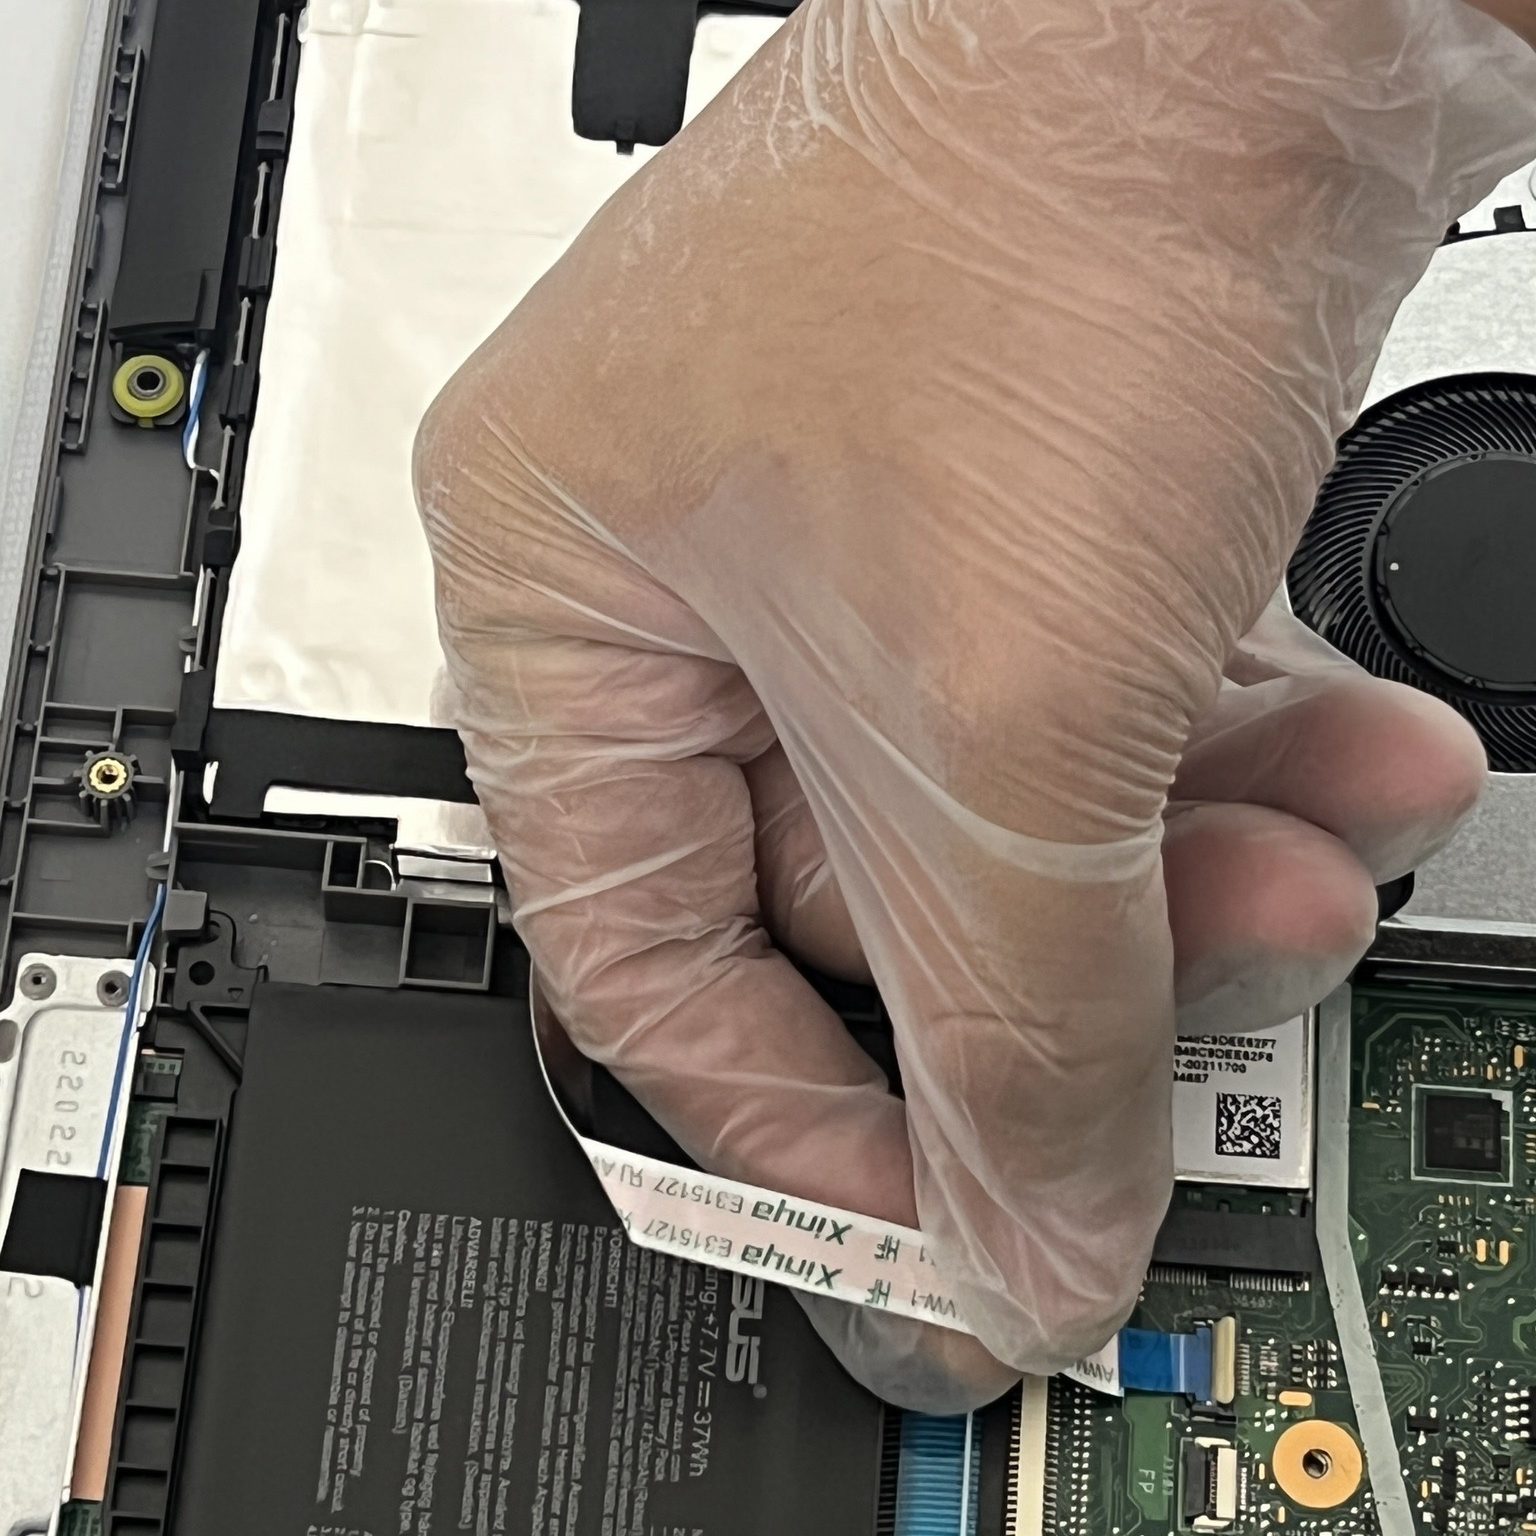
8.使用拆機工具(或是塑膠材質的薄片),將底蓋翹起
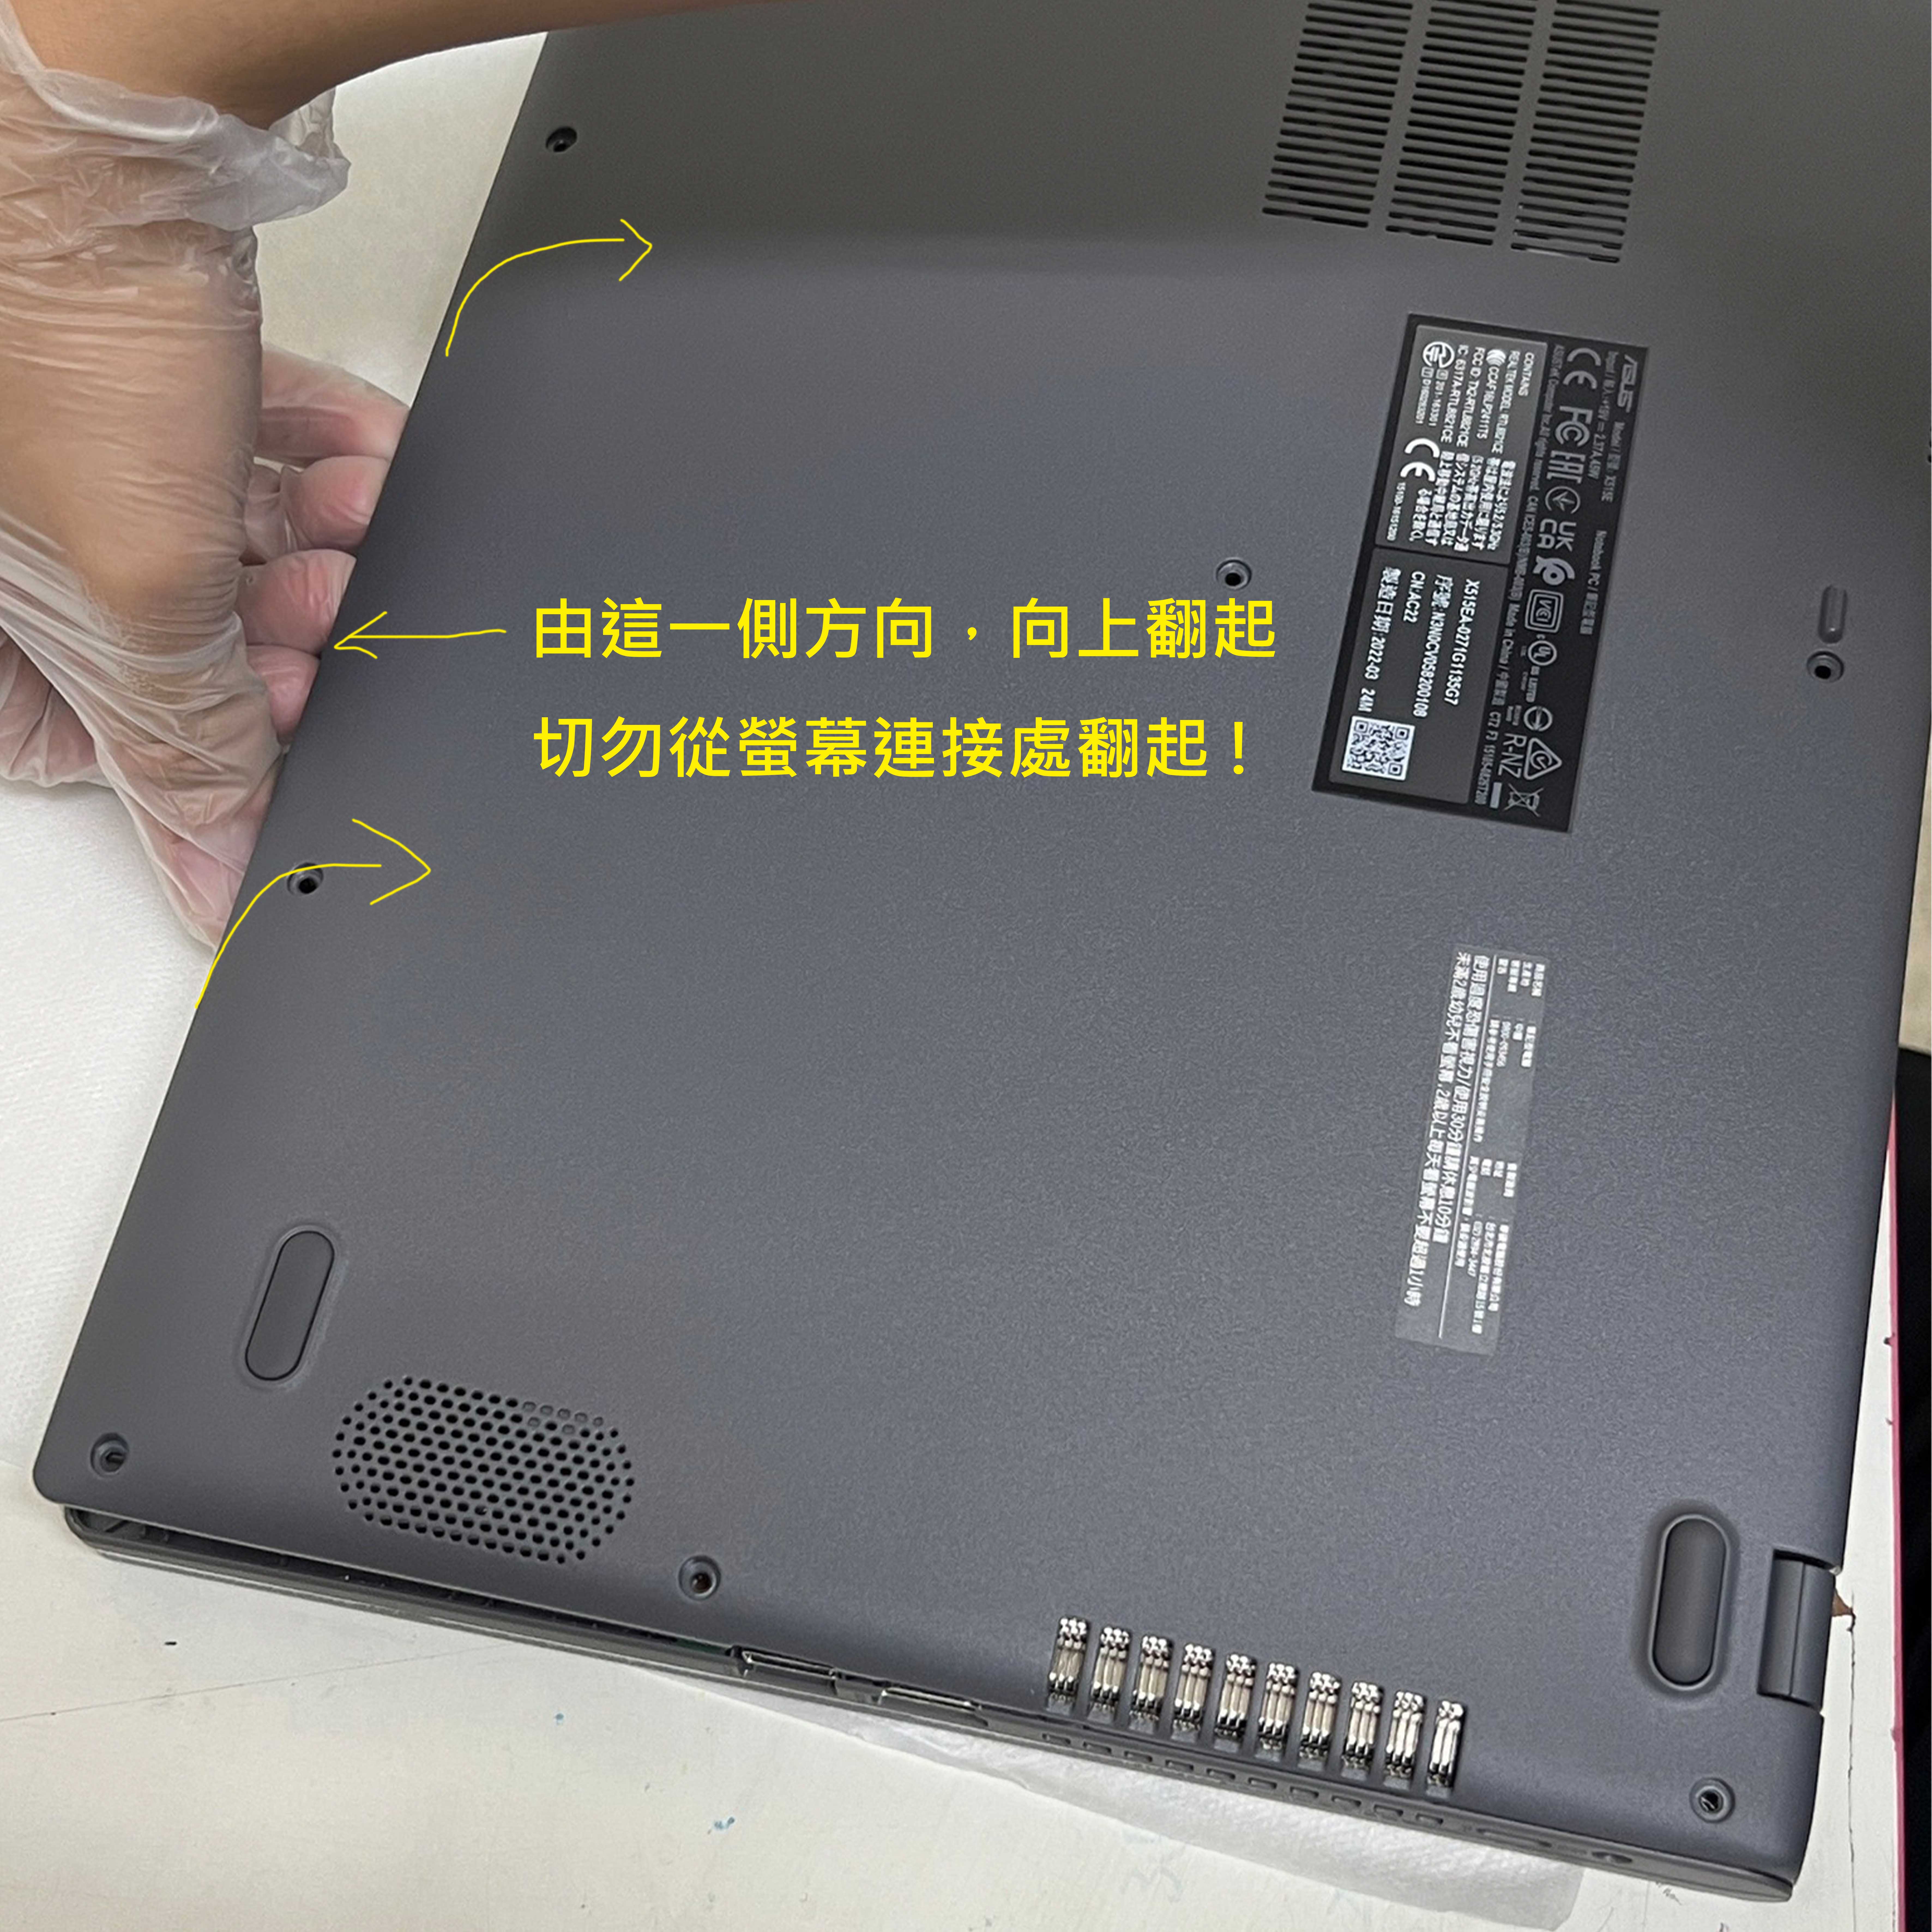
9.將底蓋螺絲全部拆下(注意螺絲長短),底蓋向上翻起(注意切勿從螢幕連接處翻起)
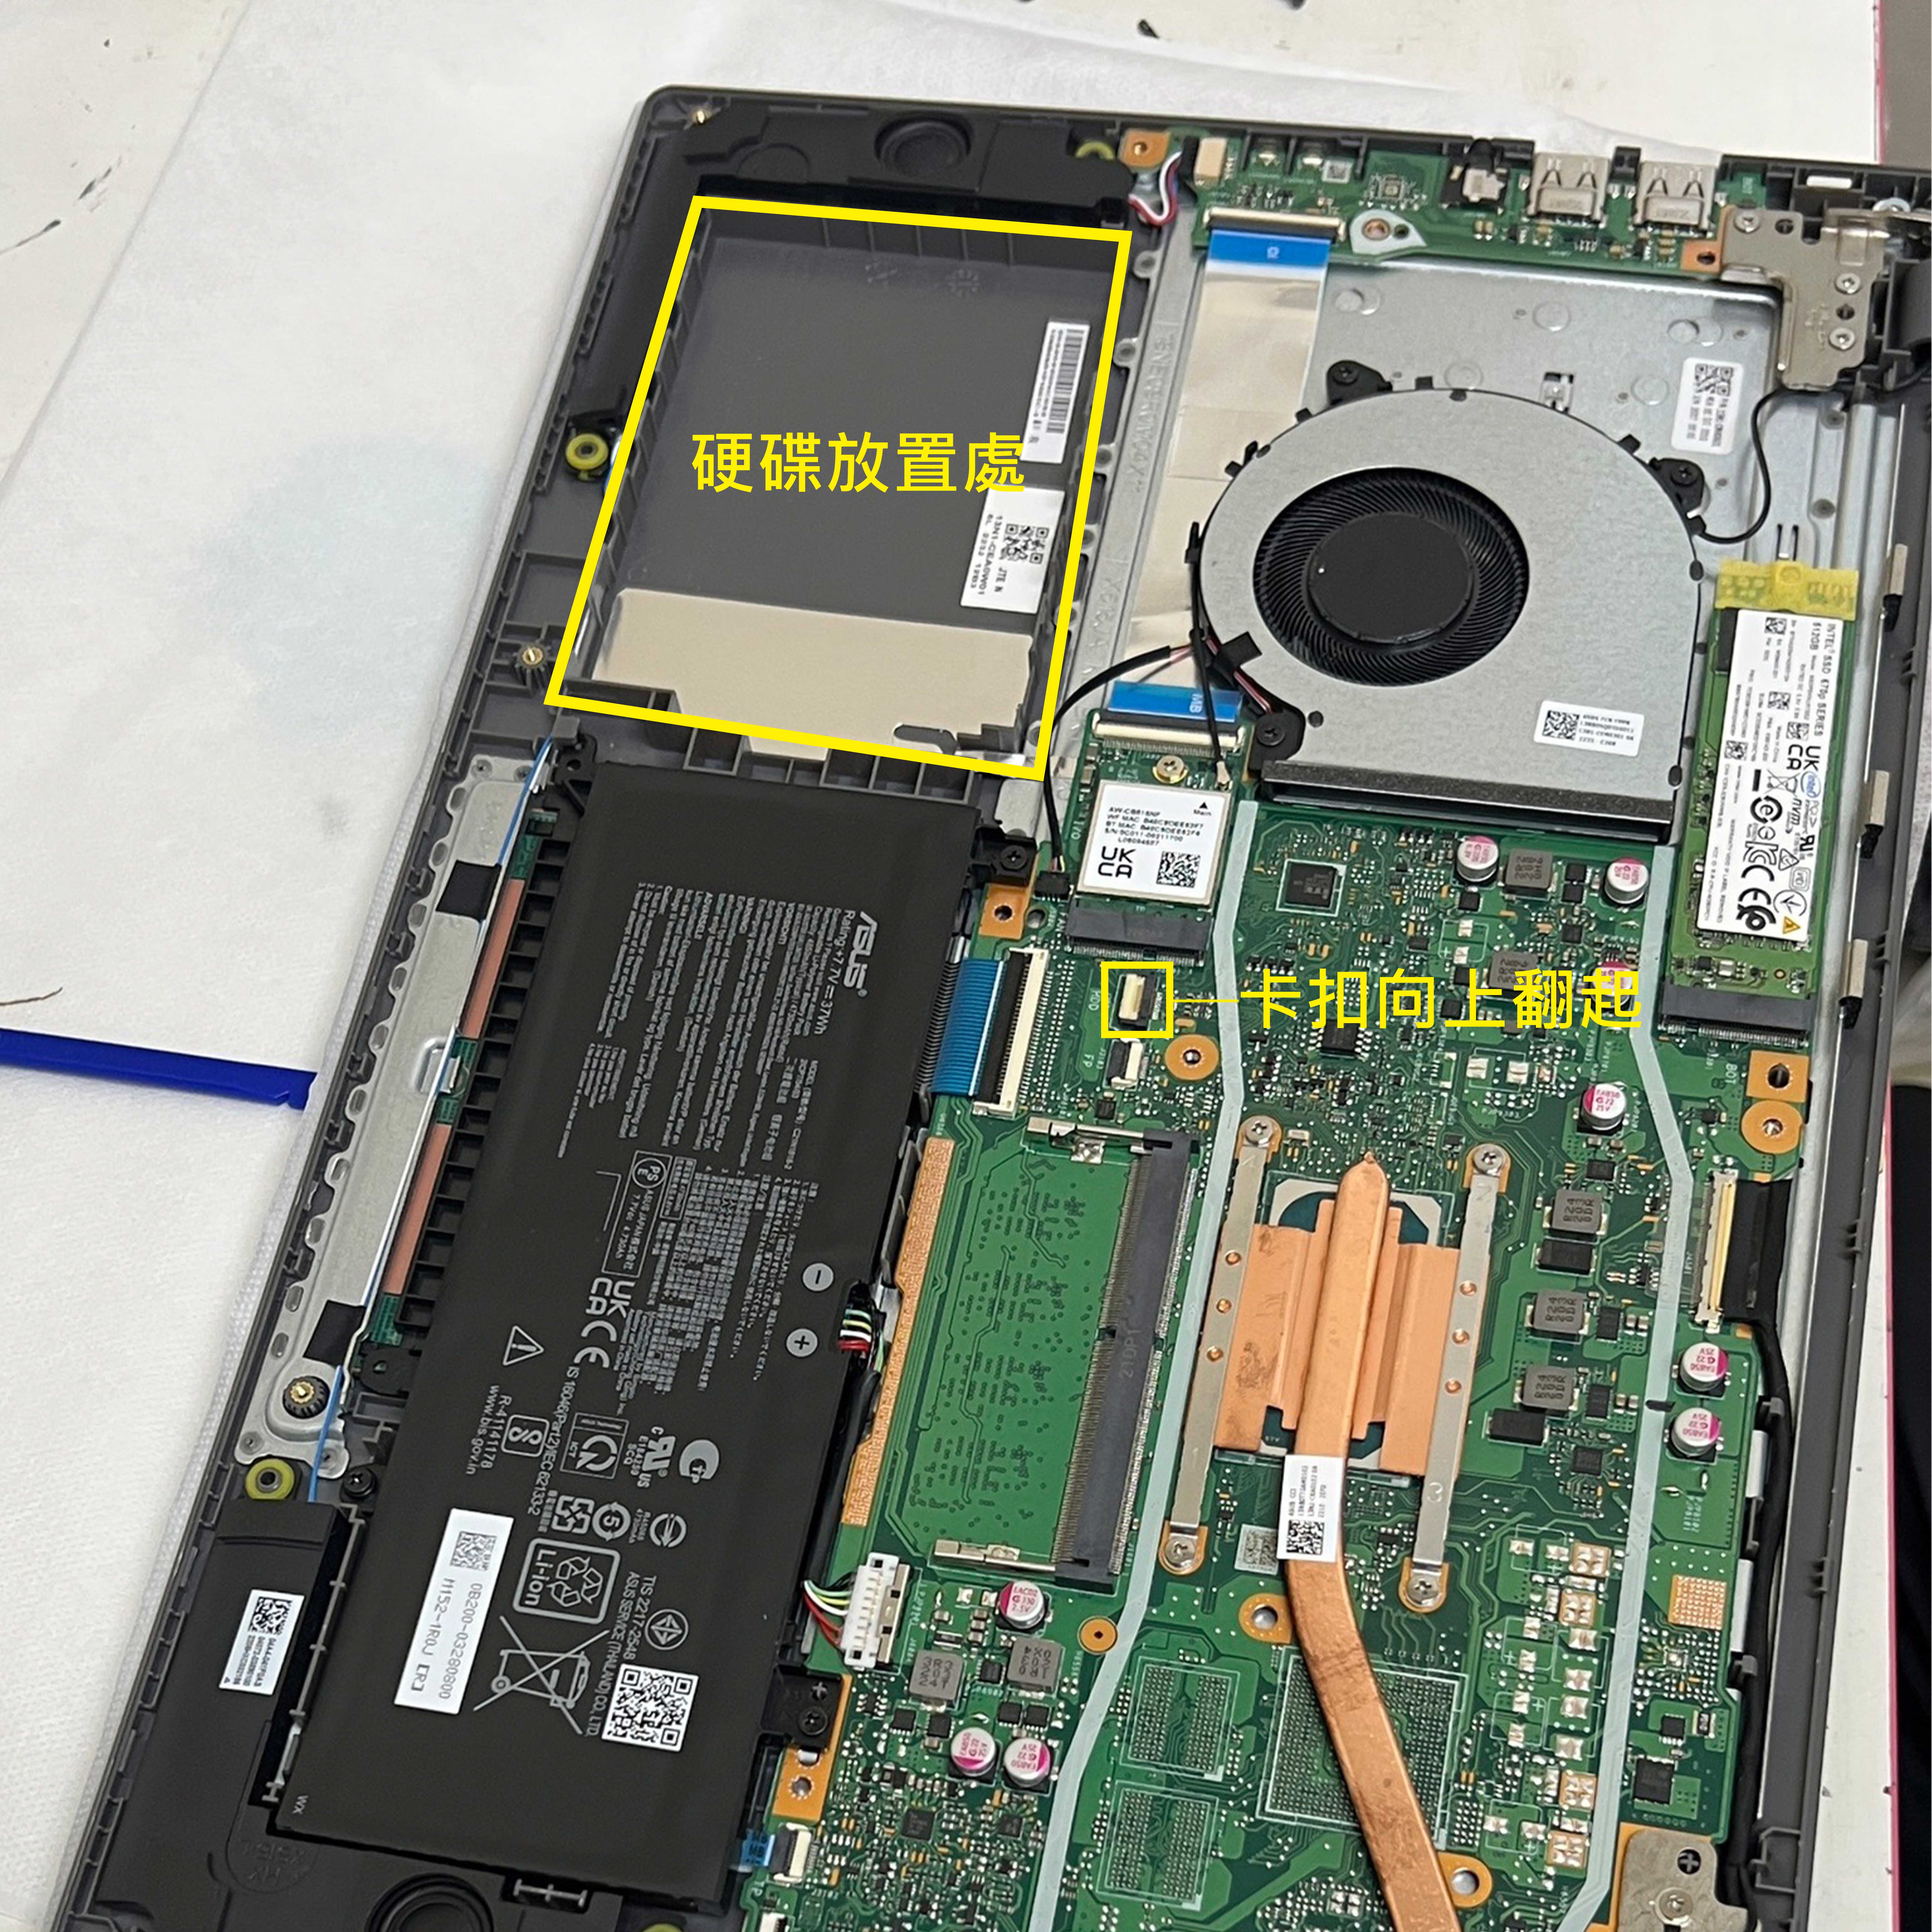
10.先將主板上的卡扣向上翻起,準備將硬碟放入囉!!
11.硬碟放入之後,排線插上主板,在將主板的卡扣壓回去,壓住排線
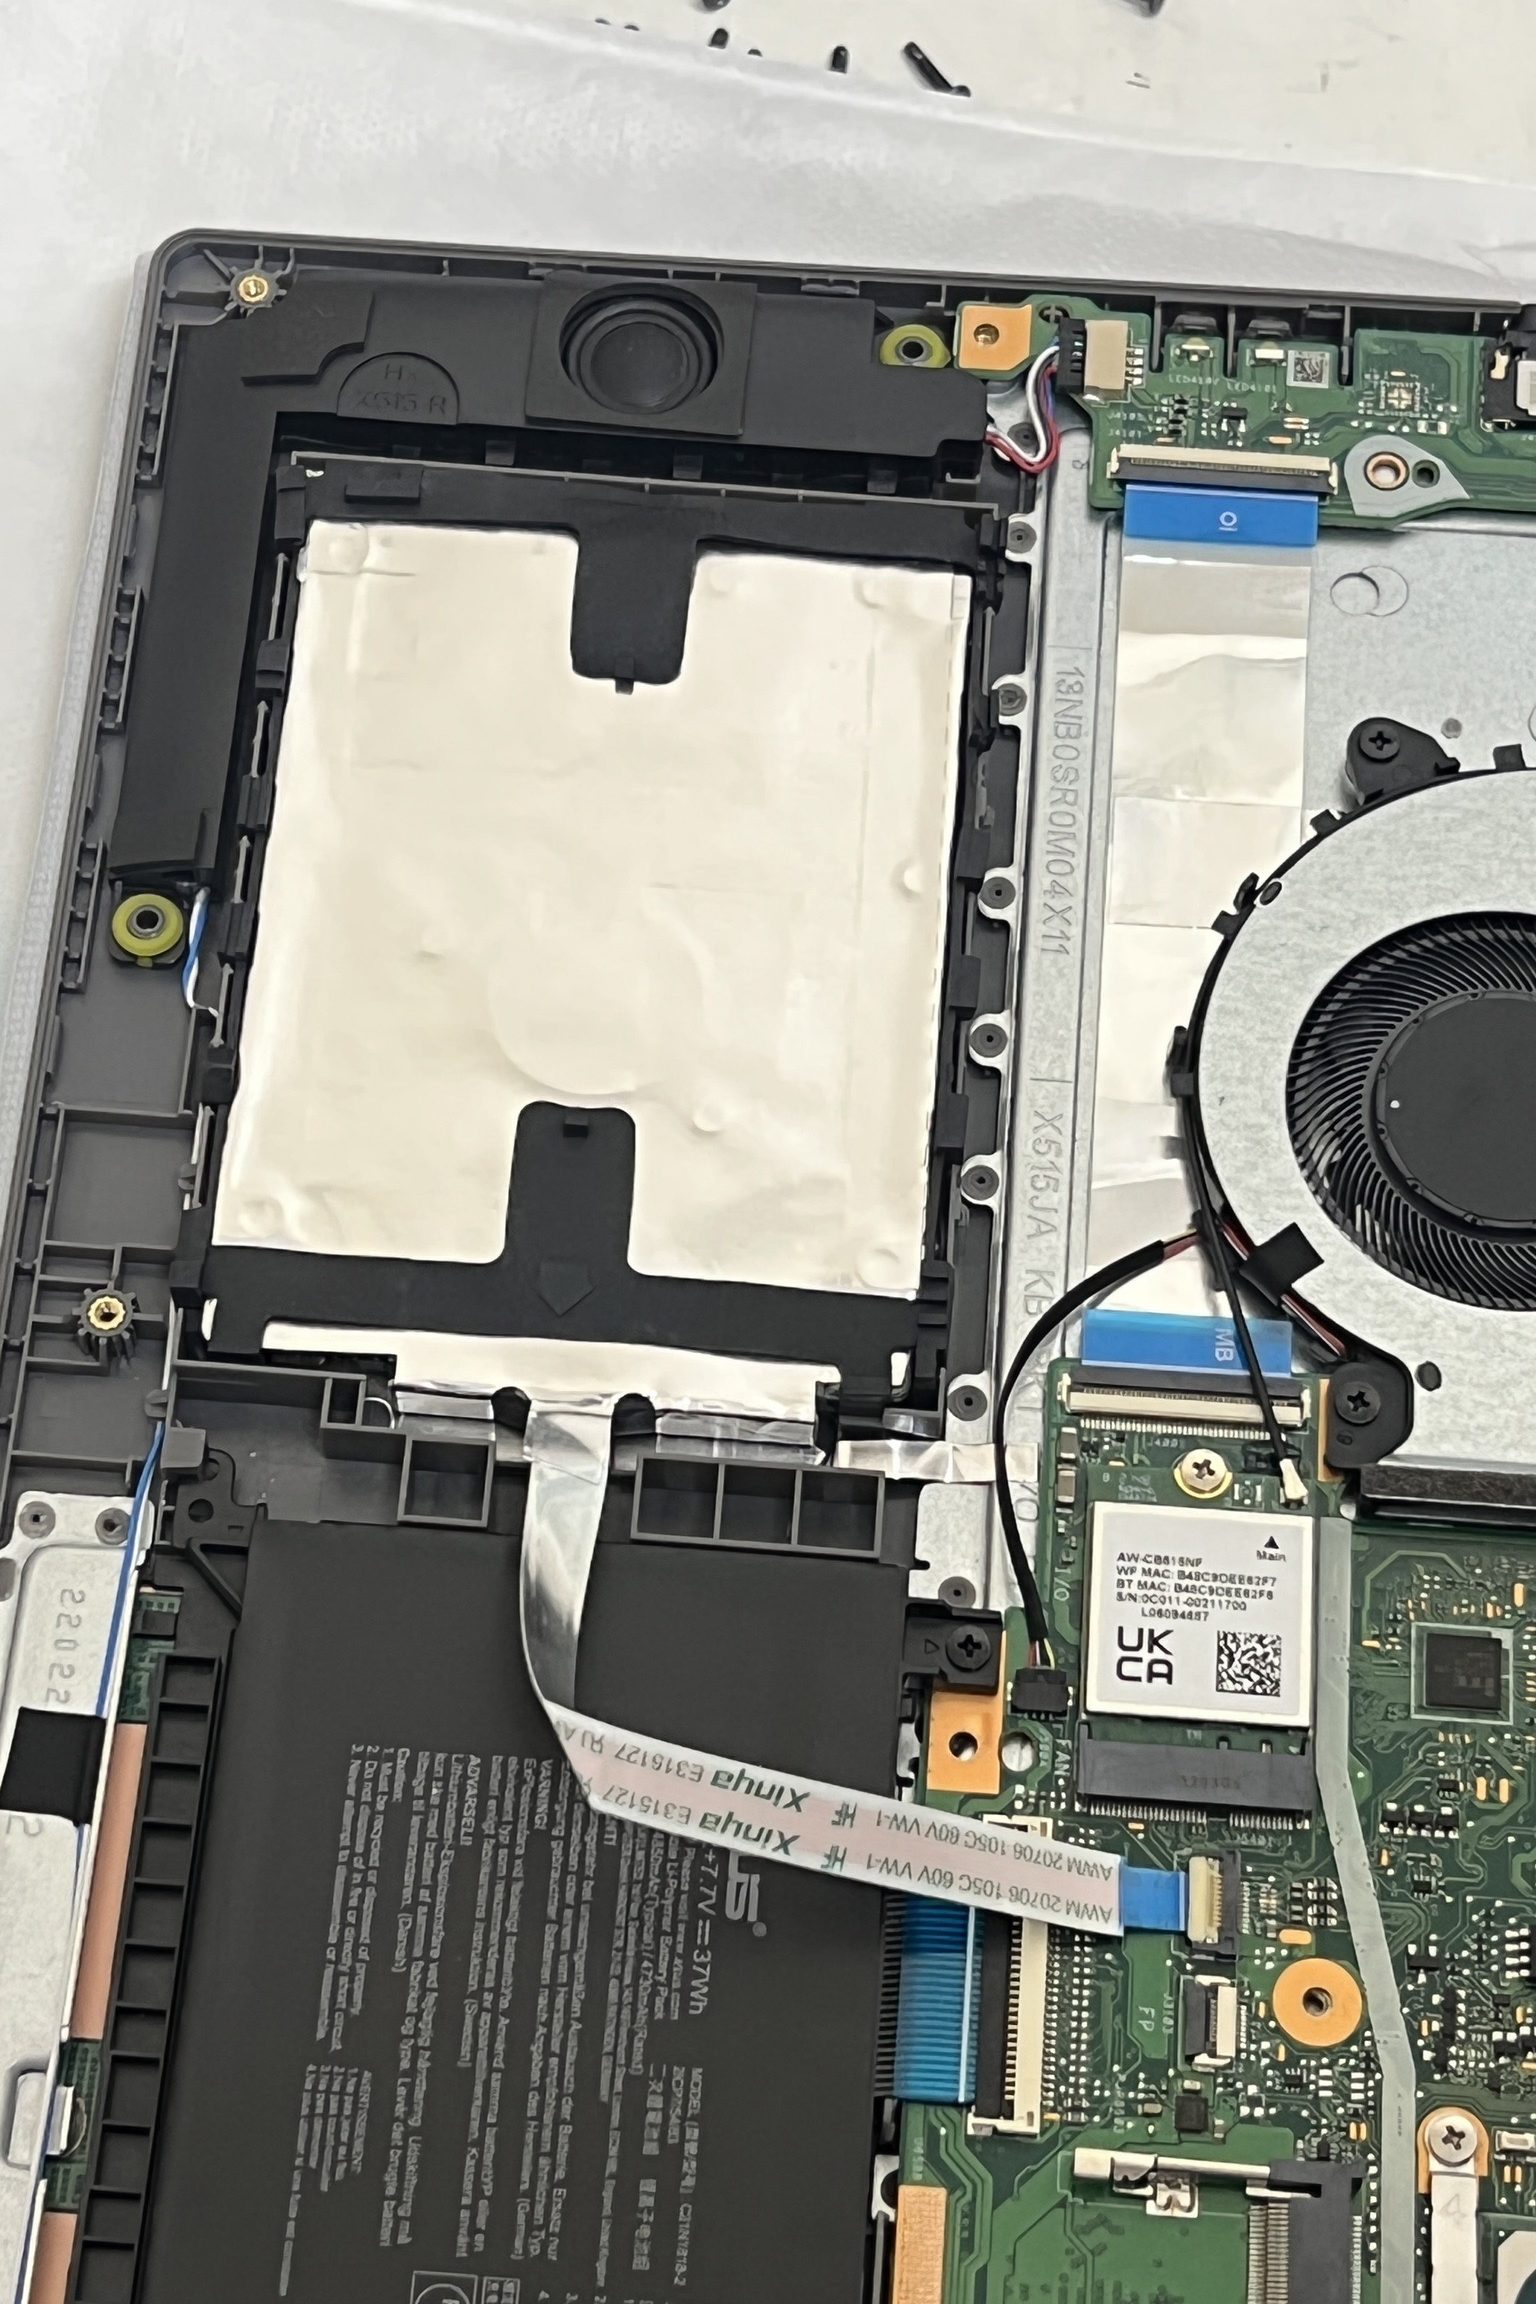
12.完成會像這樣!!!在蓋上底板及鎖上螺絲即可喔!